The unfortunate reality of three tab shingles is that sometimes they blow off during high winds, leaving your roof exposed to possible water infiltration. If you notice a missing shingle tab on your roof, and you feel confident that you can repair the area yourself, there are certain steps you must follow to ensure that you repair your roof properly. While not following these steps won’t be the end of the world, or your roof, they will make it easier for you, as well as give you the peace of mind knowing you fixed the shingle properly.
Step One: Identify the damage and how many tabs are missing.

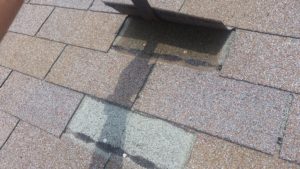
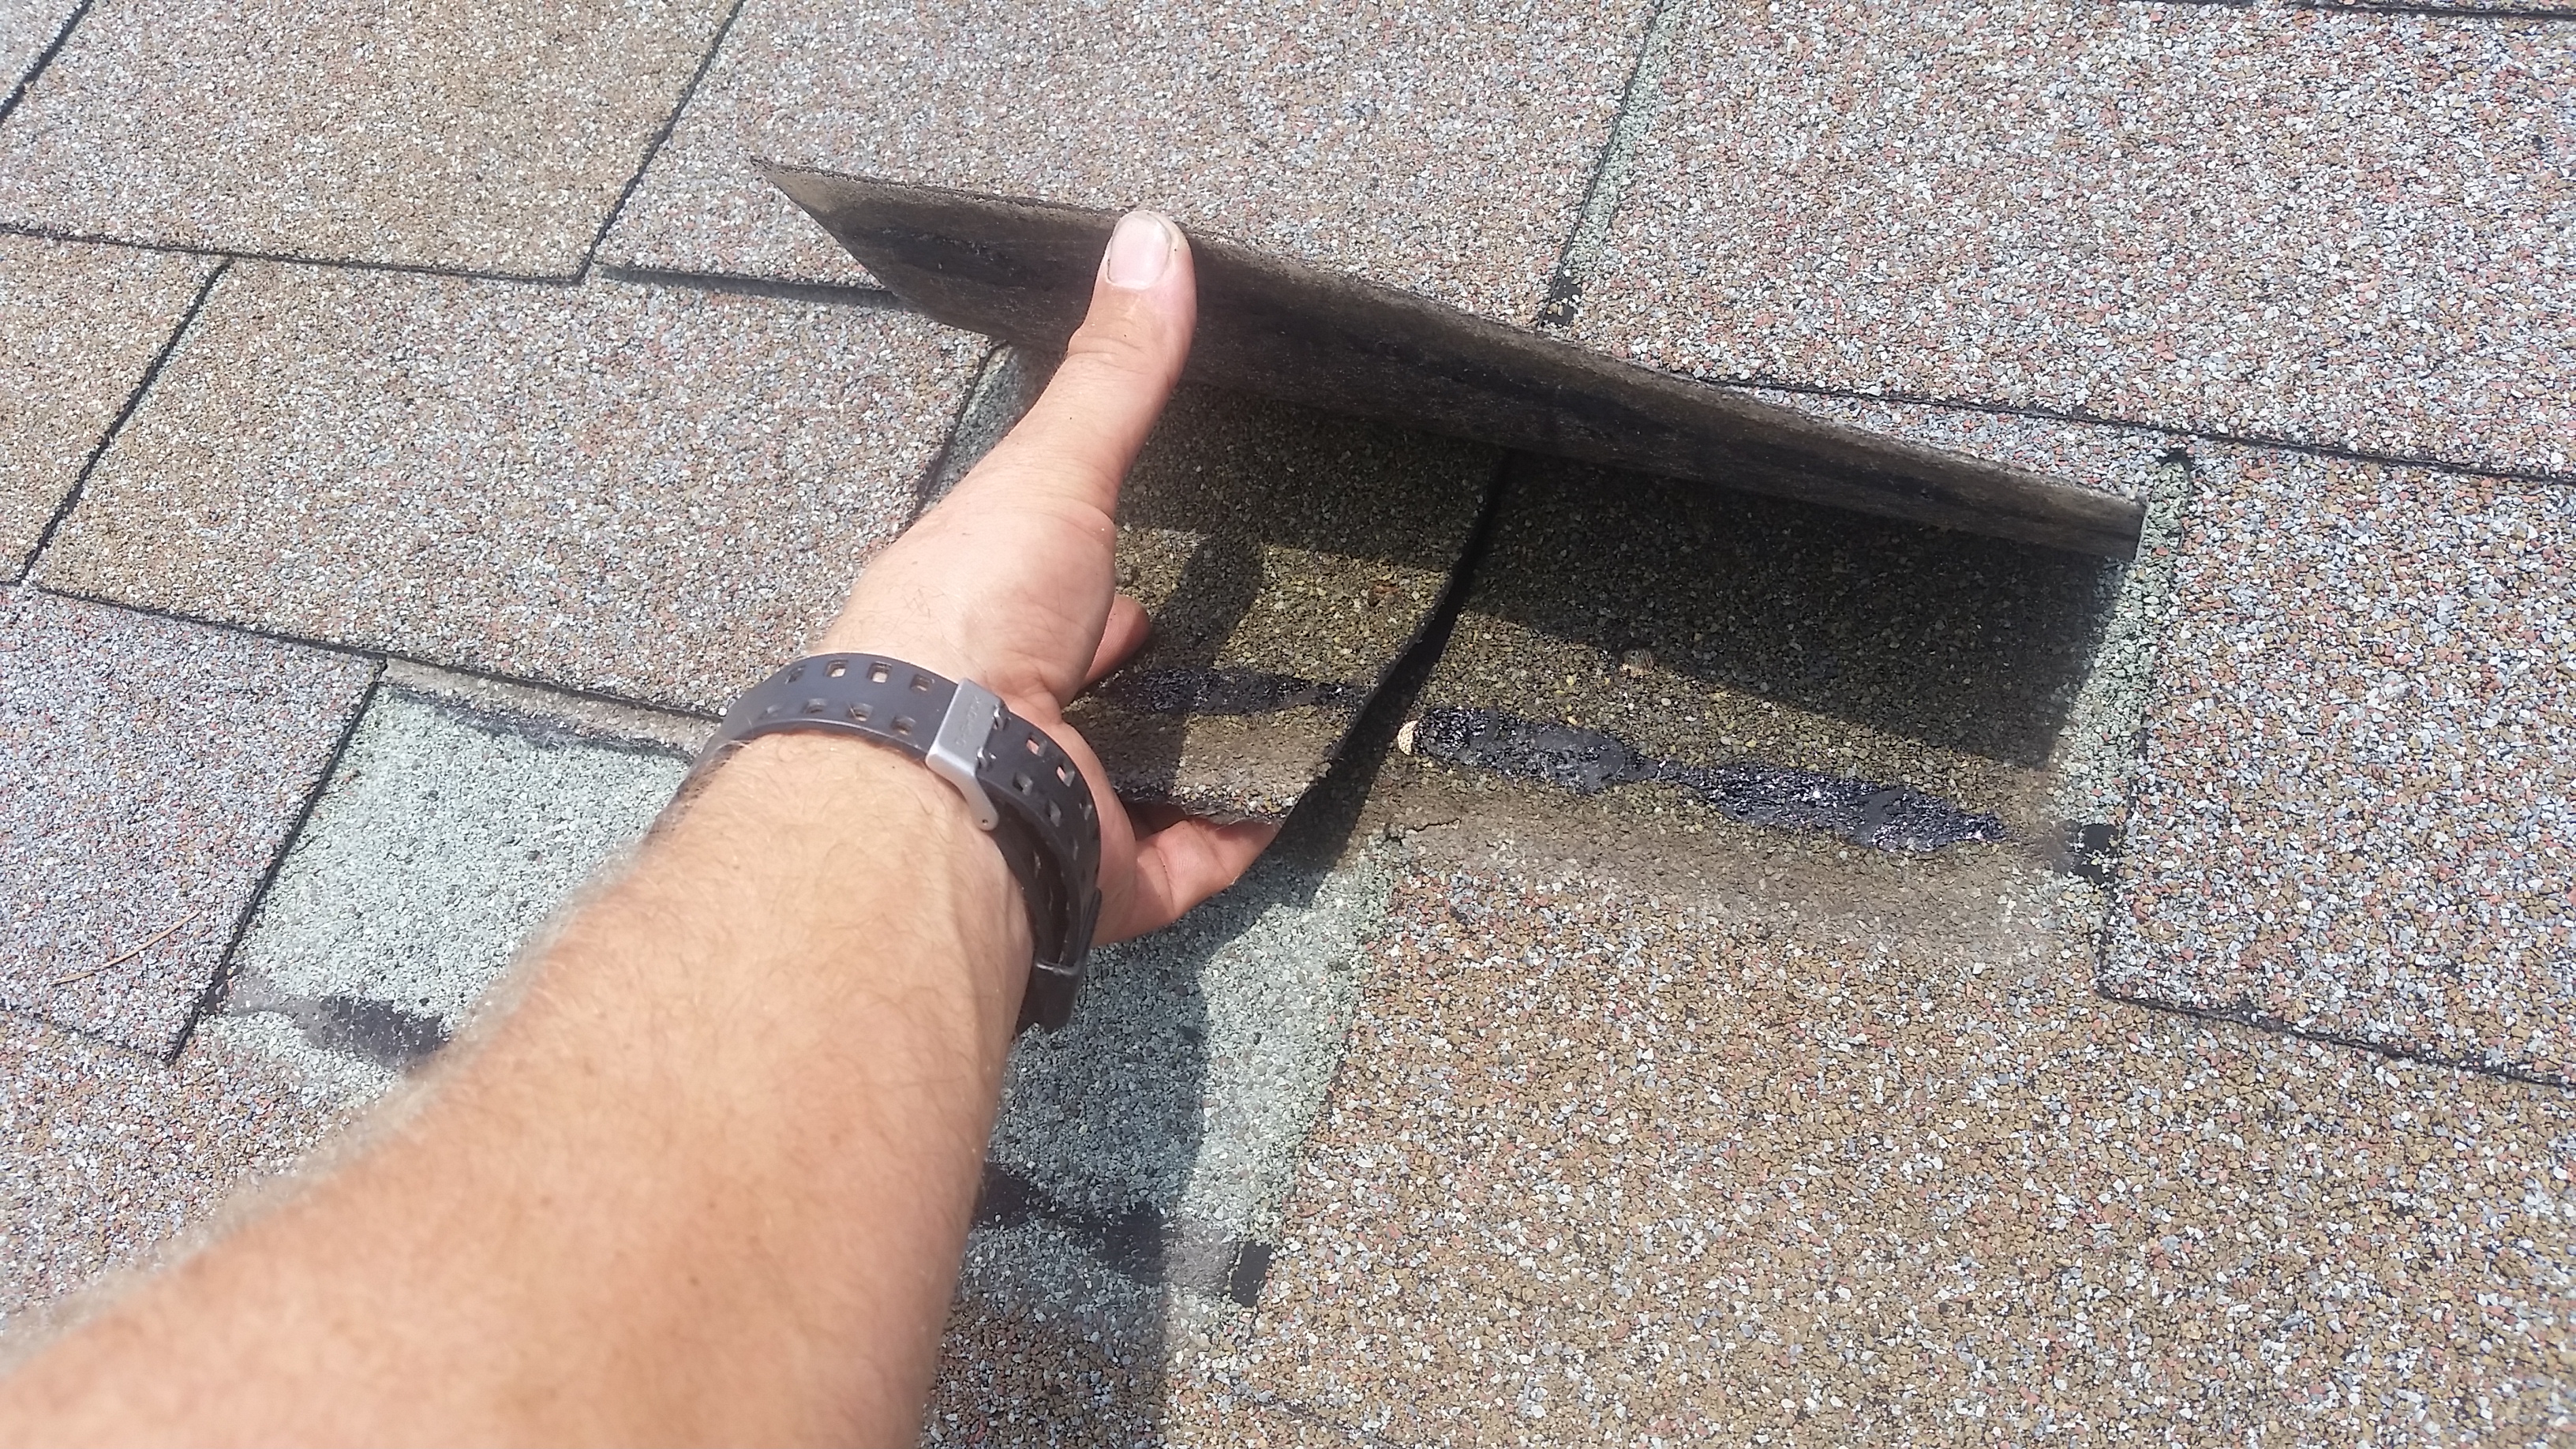
A missing shingle tab on a 3 tab roof.
Step Two: The tabs should be stuck together by a strip of asphalt adhesive. Loosen the shingle tabs with a flat bar so you can pull the tabs above up, and remove the nails directly above the missing tab.

Pull the shingle up carefully to expose the nails undeneath.

Remove the nails holding the ripped tab.
Step Three: Loosen the adhesive holding the tab, and then remove the nails from the tabs above the missing tab.
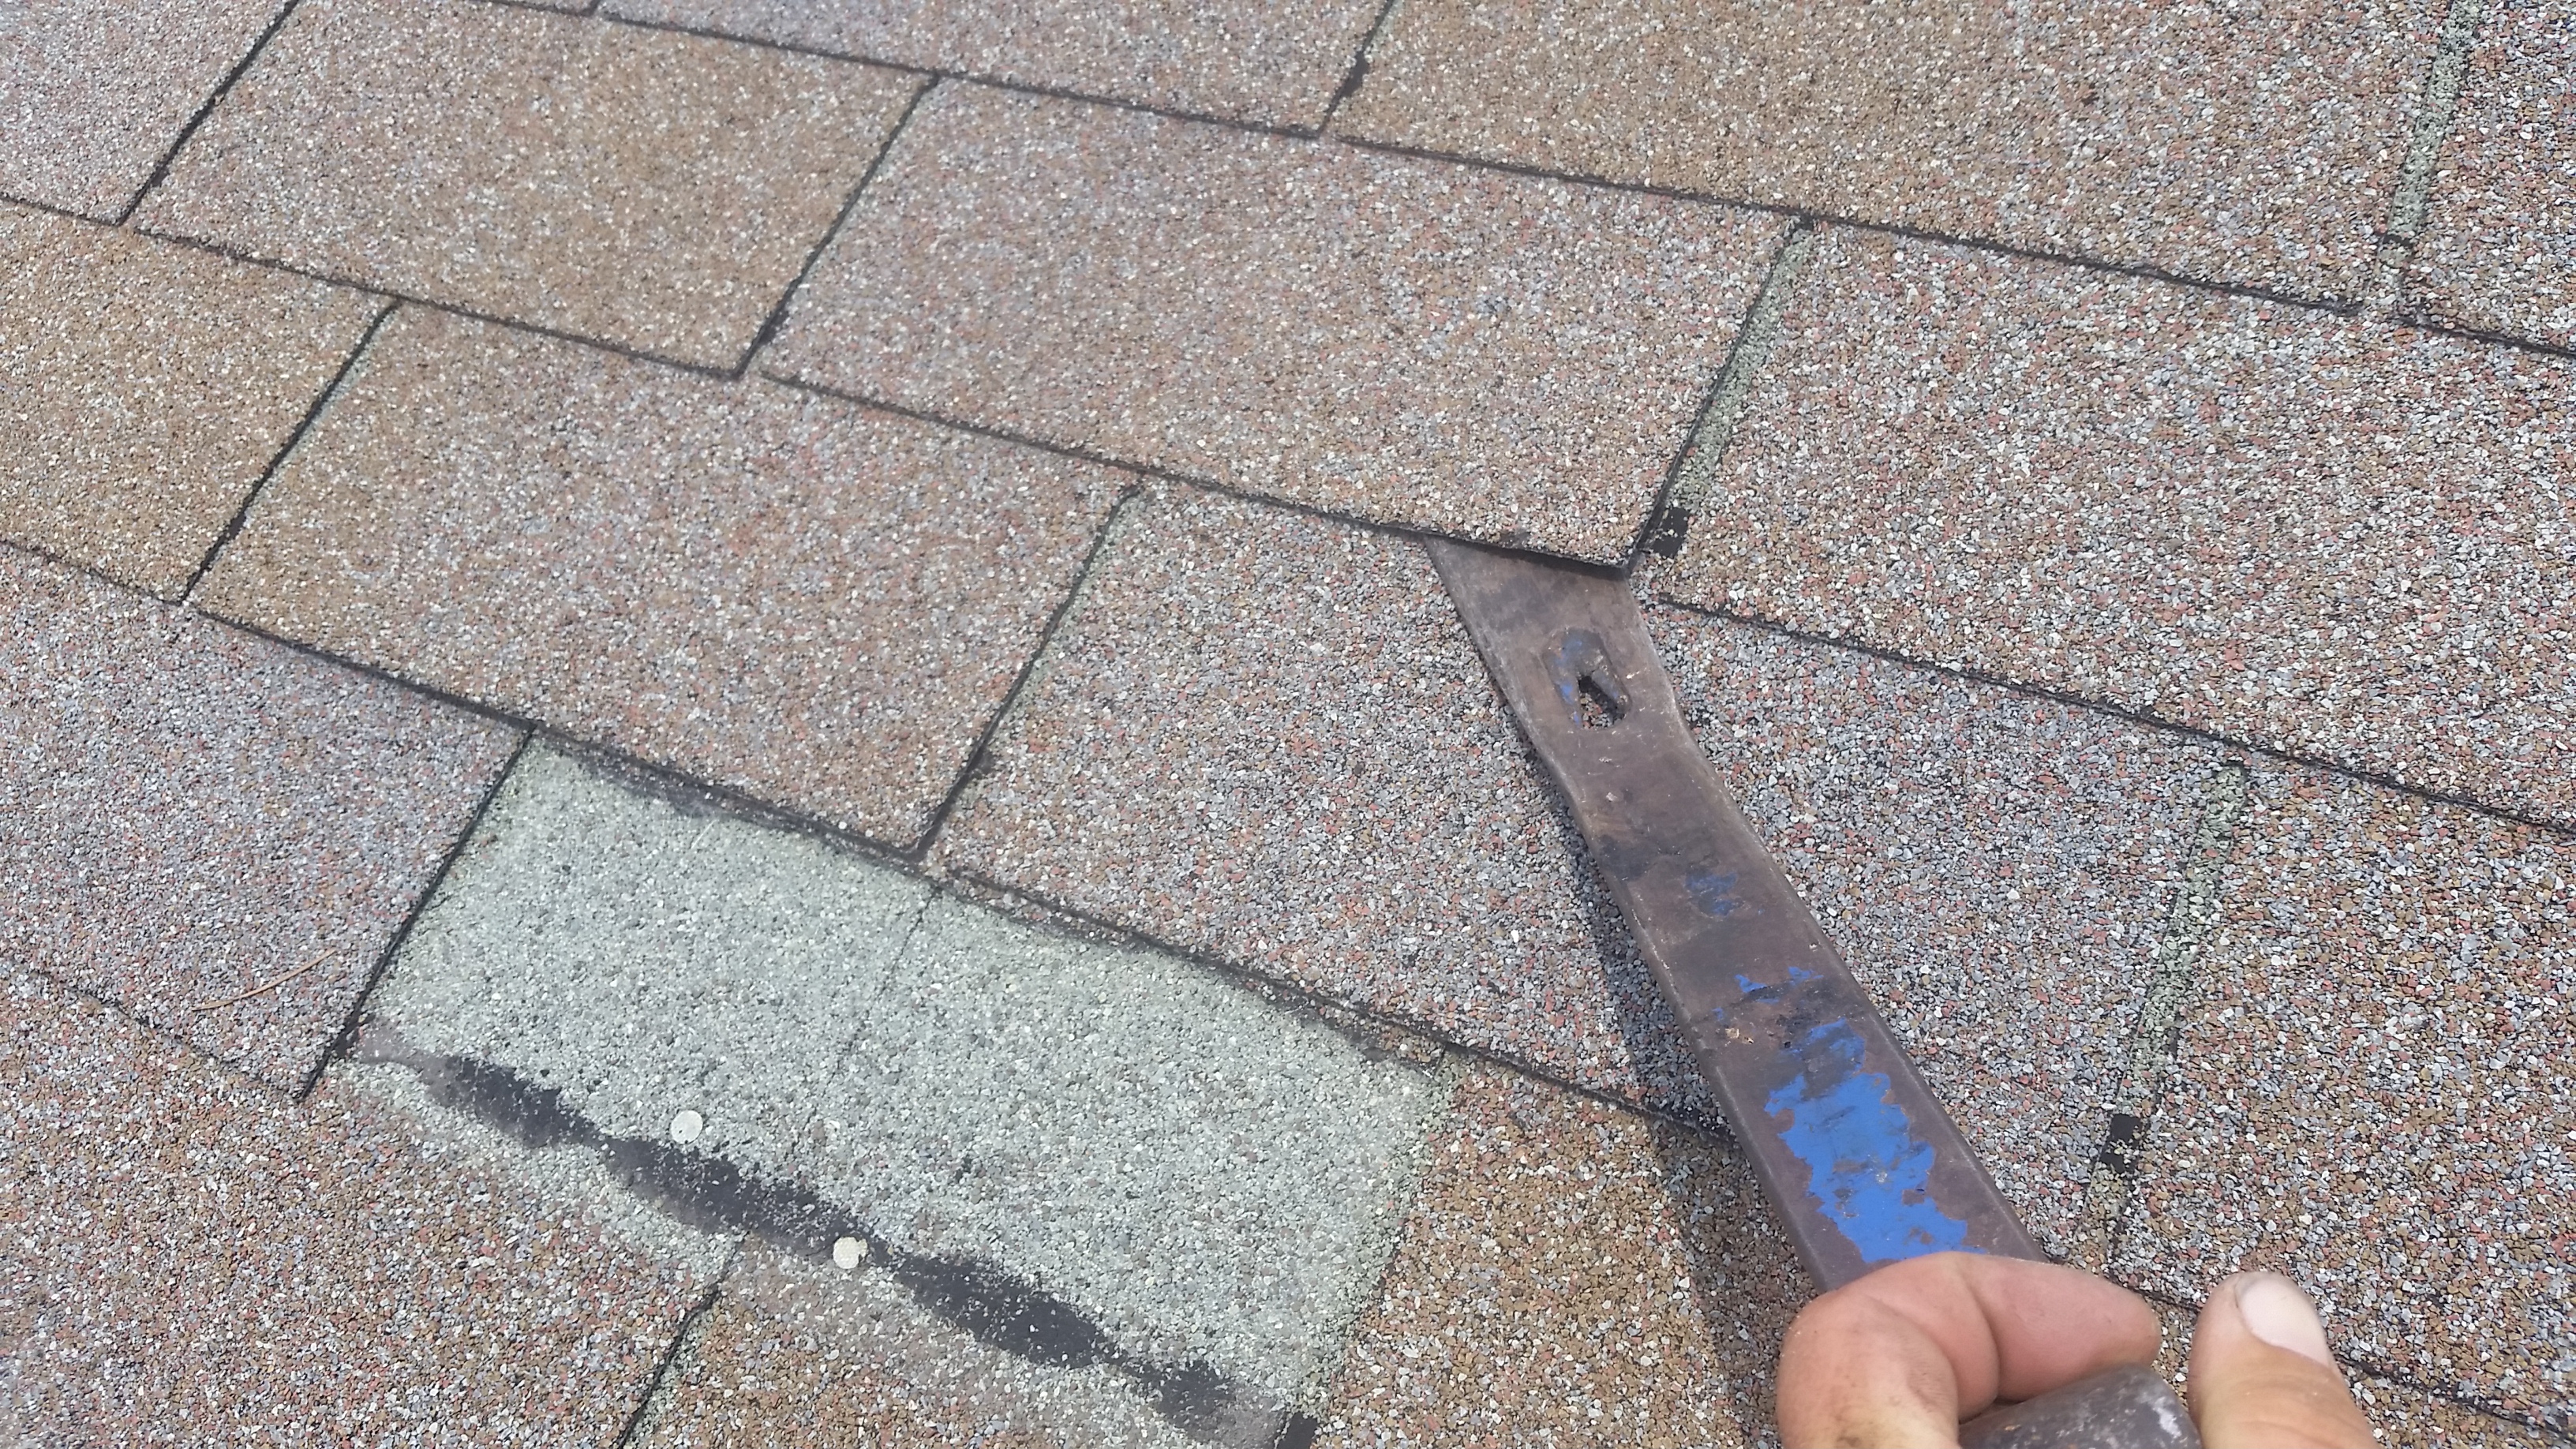
Loosen the shingles up by sliding the nail bar under the tab and breaking the bond between the two shingles.
Locate the nails holding the top of the tab down, making sure not to tear any other tabs.
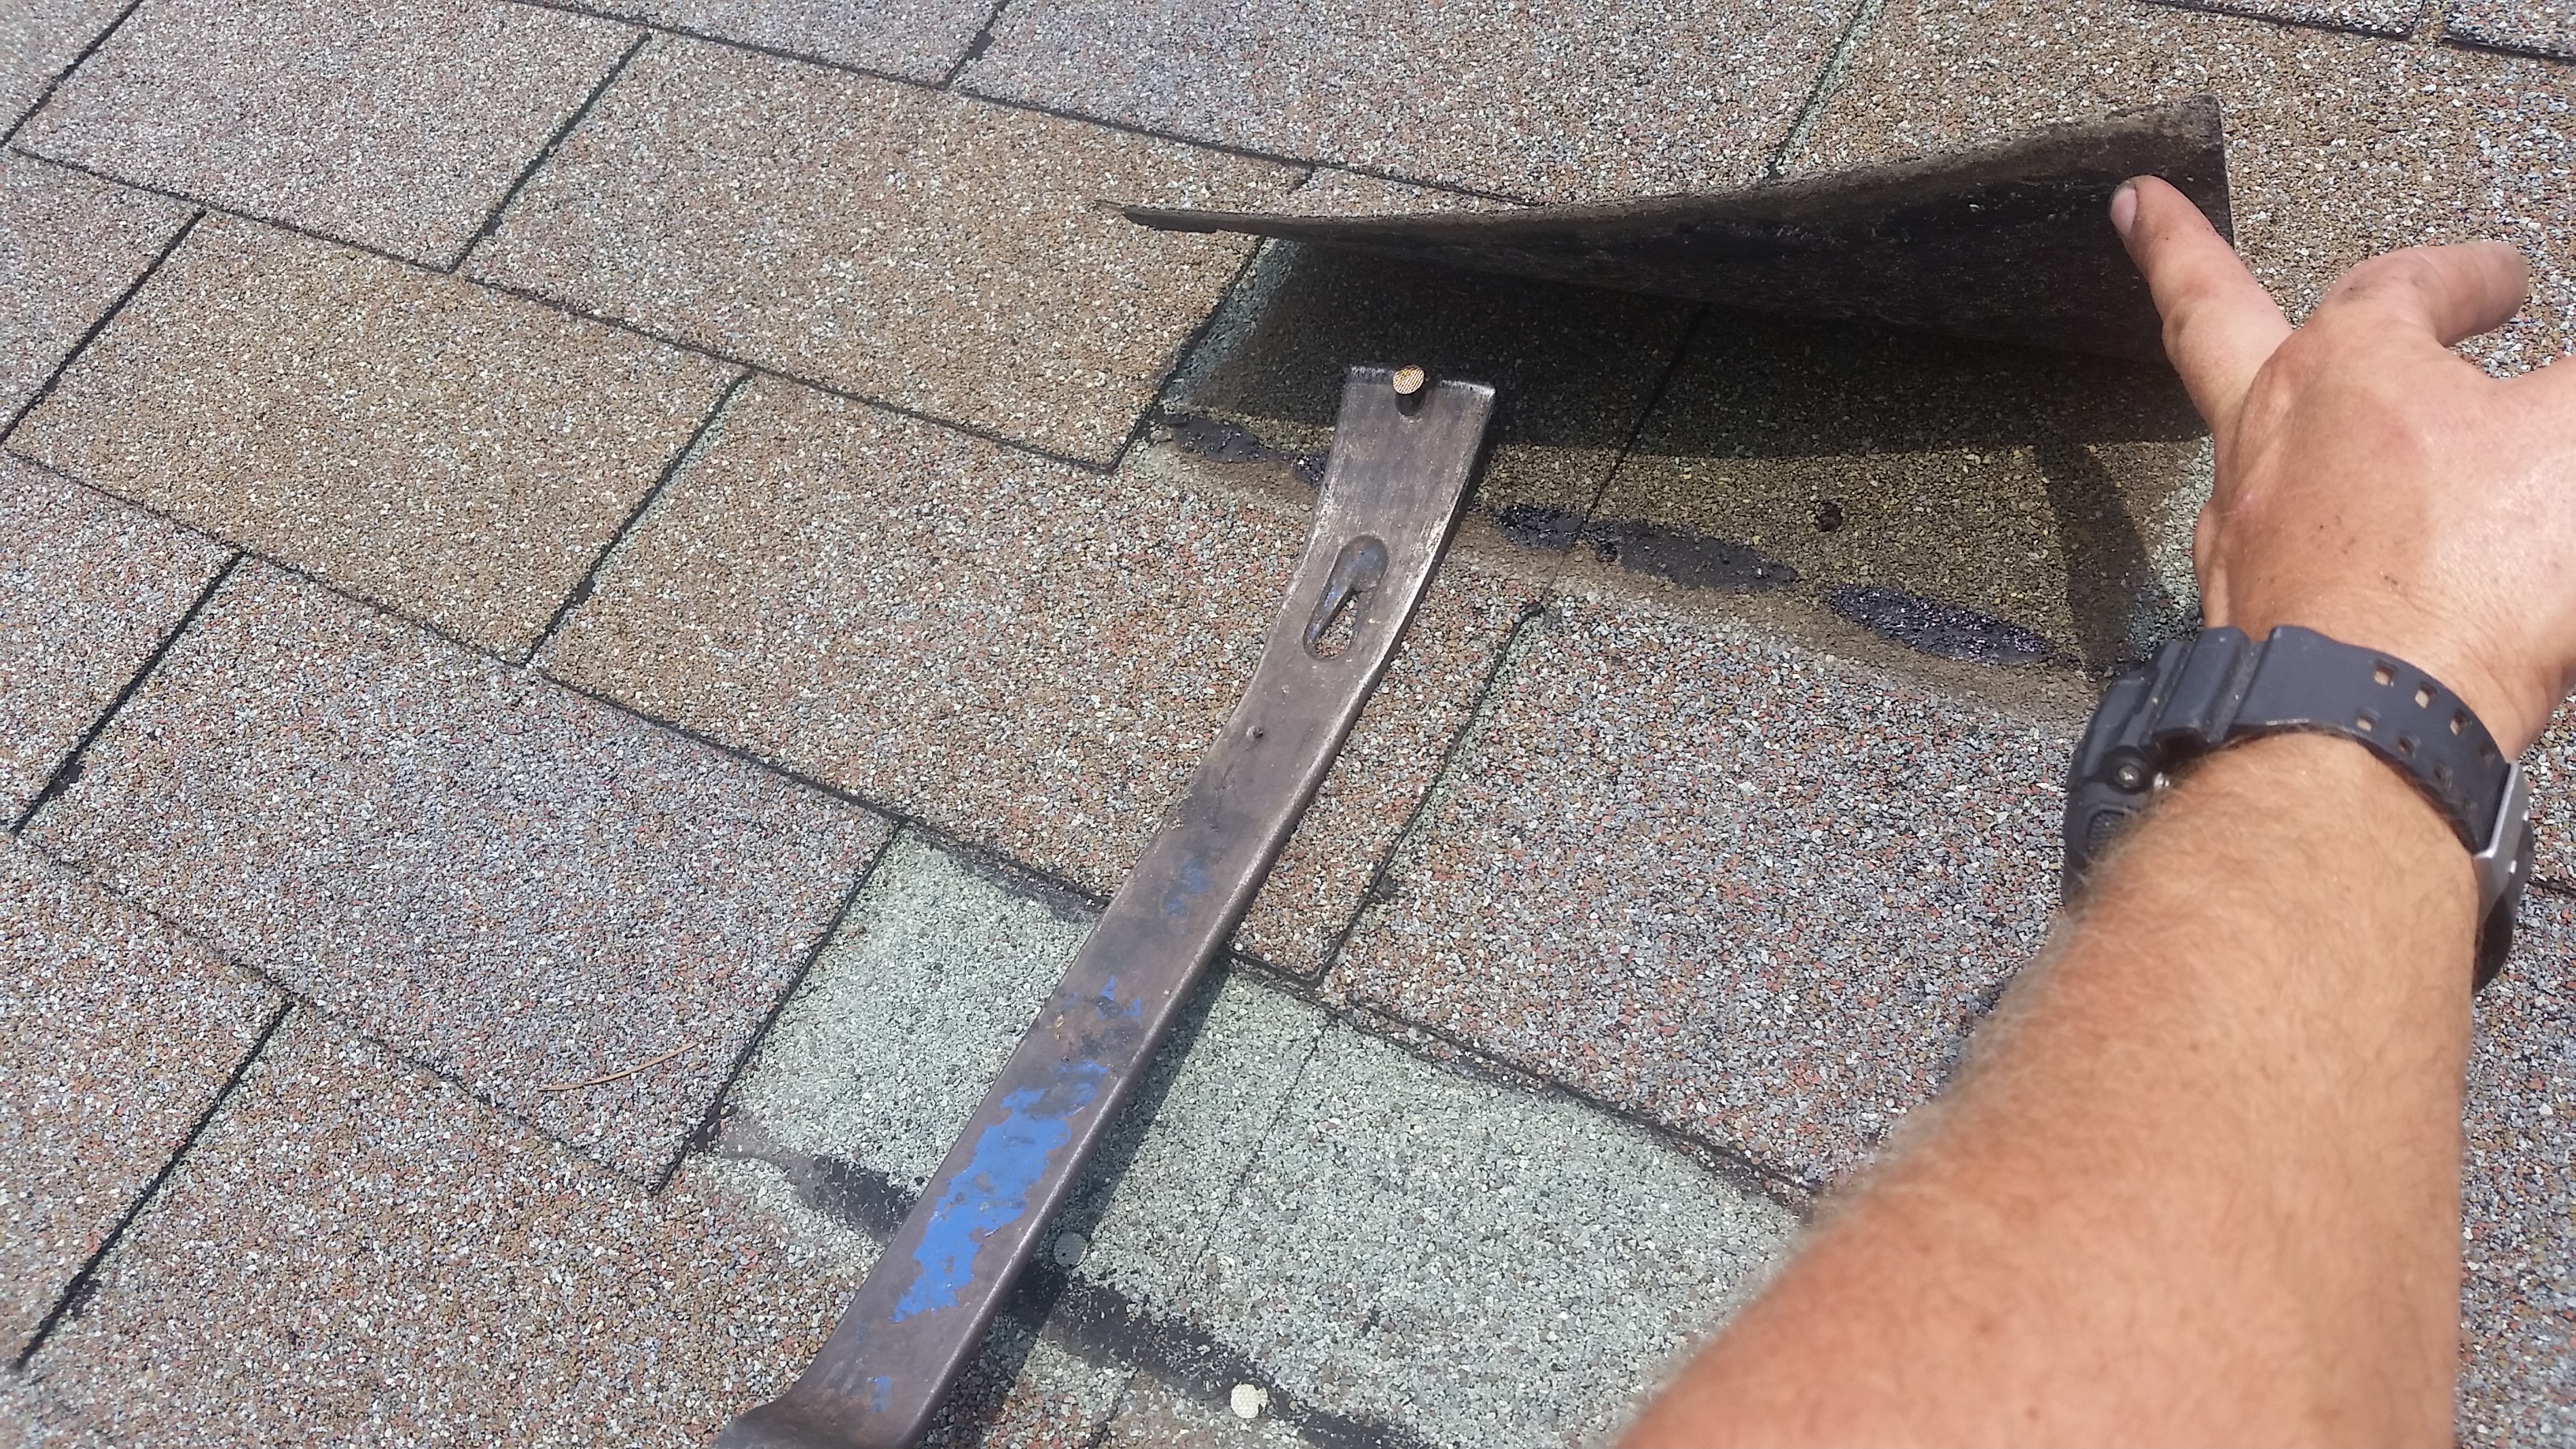
Remove all nails needed to remove the tab.
Step Four: Gently pull the shingles above the missing tab up so you can get your knife under to cut the tab out. You’ll want to use a hook blade if you can, but scissors will work also. If you do not cut the shingle all the way up, you risk tearing it when you try to pull it out. Also, try to keep you cut straight with the side of the tab to avoid any problems lining up the new tab. Once you cut one side out, be sure to cut the other side unless it’s the end of the shingle.
Using the edge of the missing tab as a guide, cut a straight line from the top of the shingle to the key way.
Now the tab is cut on both ends and ready to slide out.
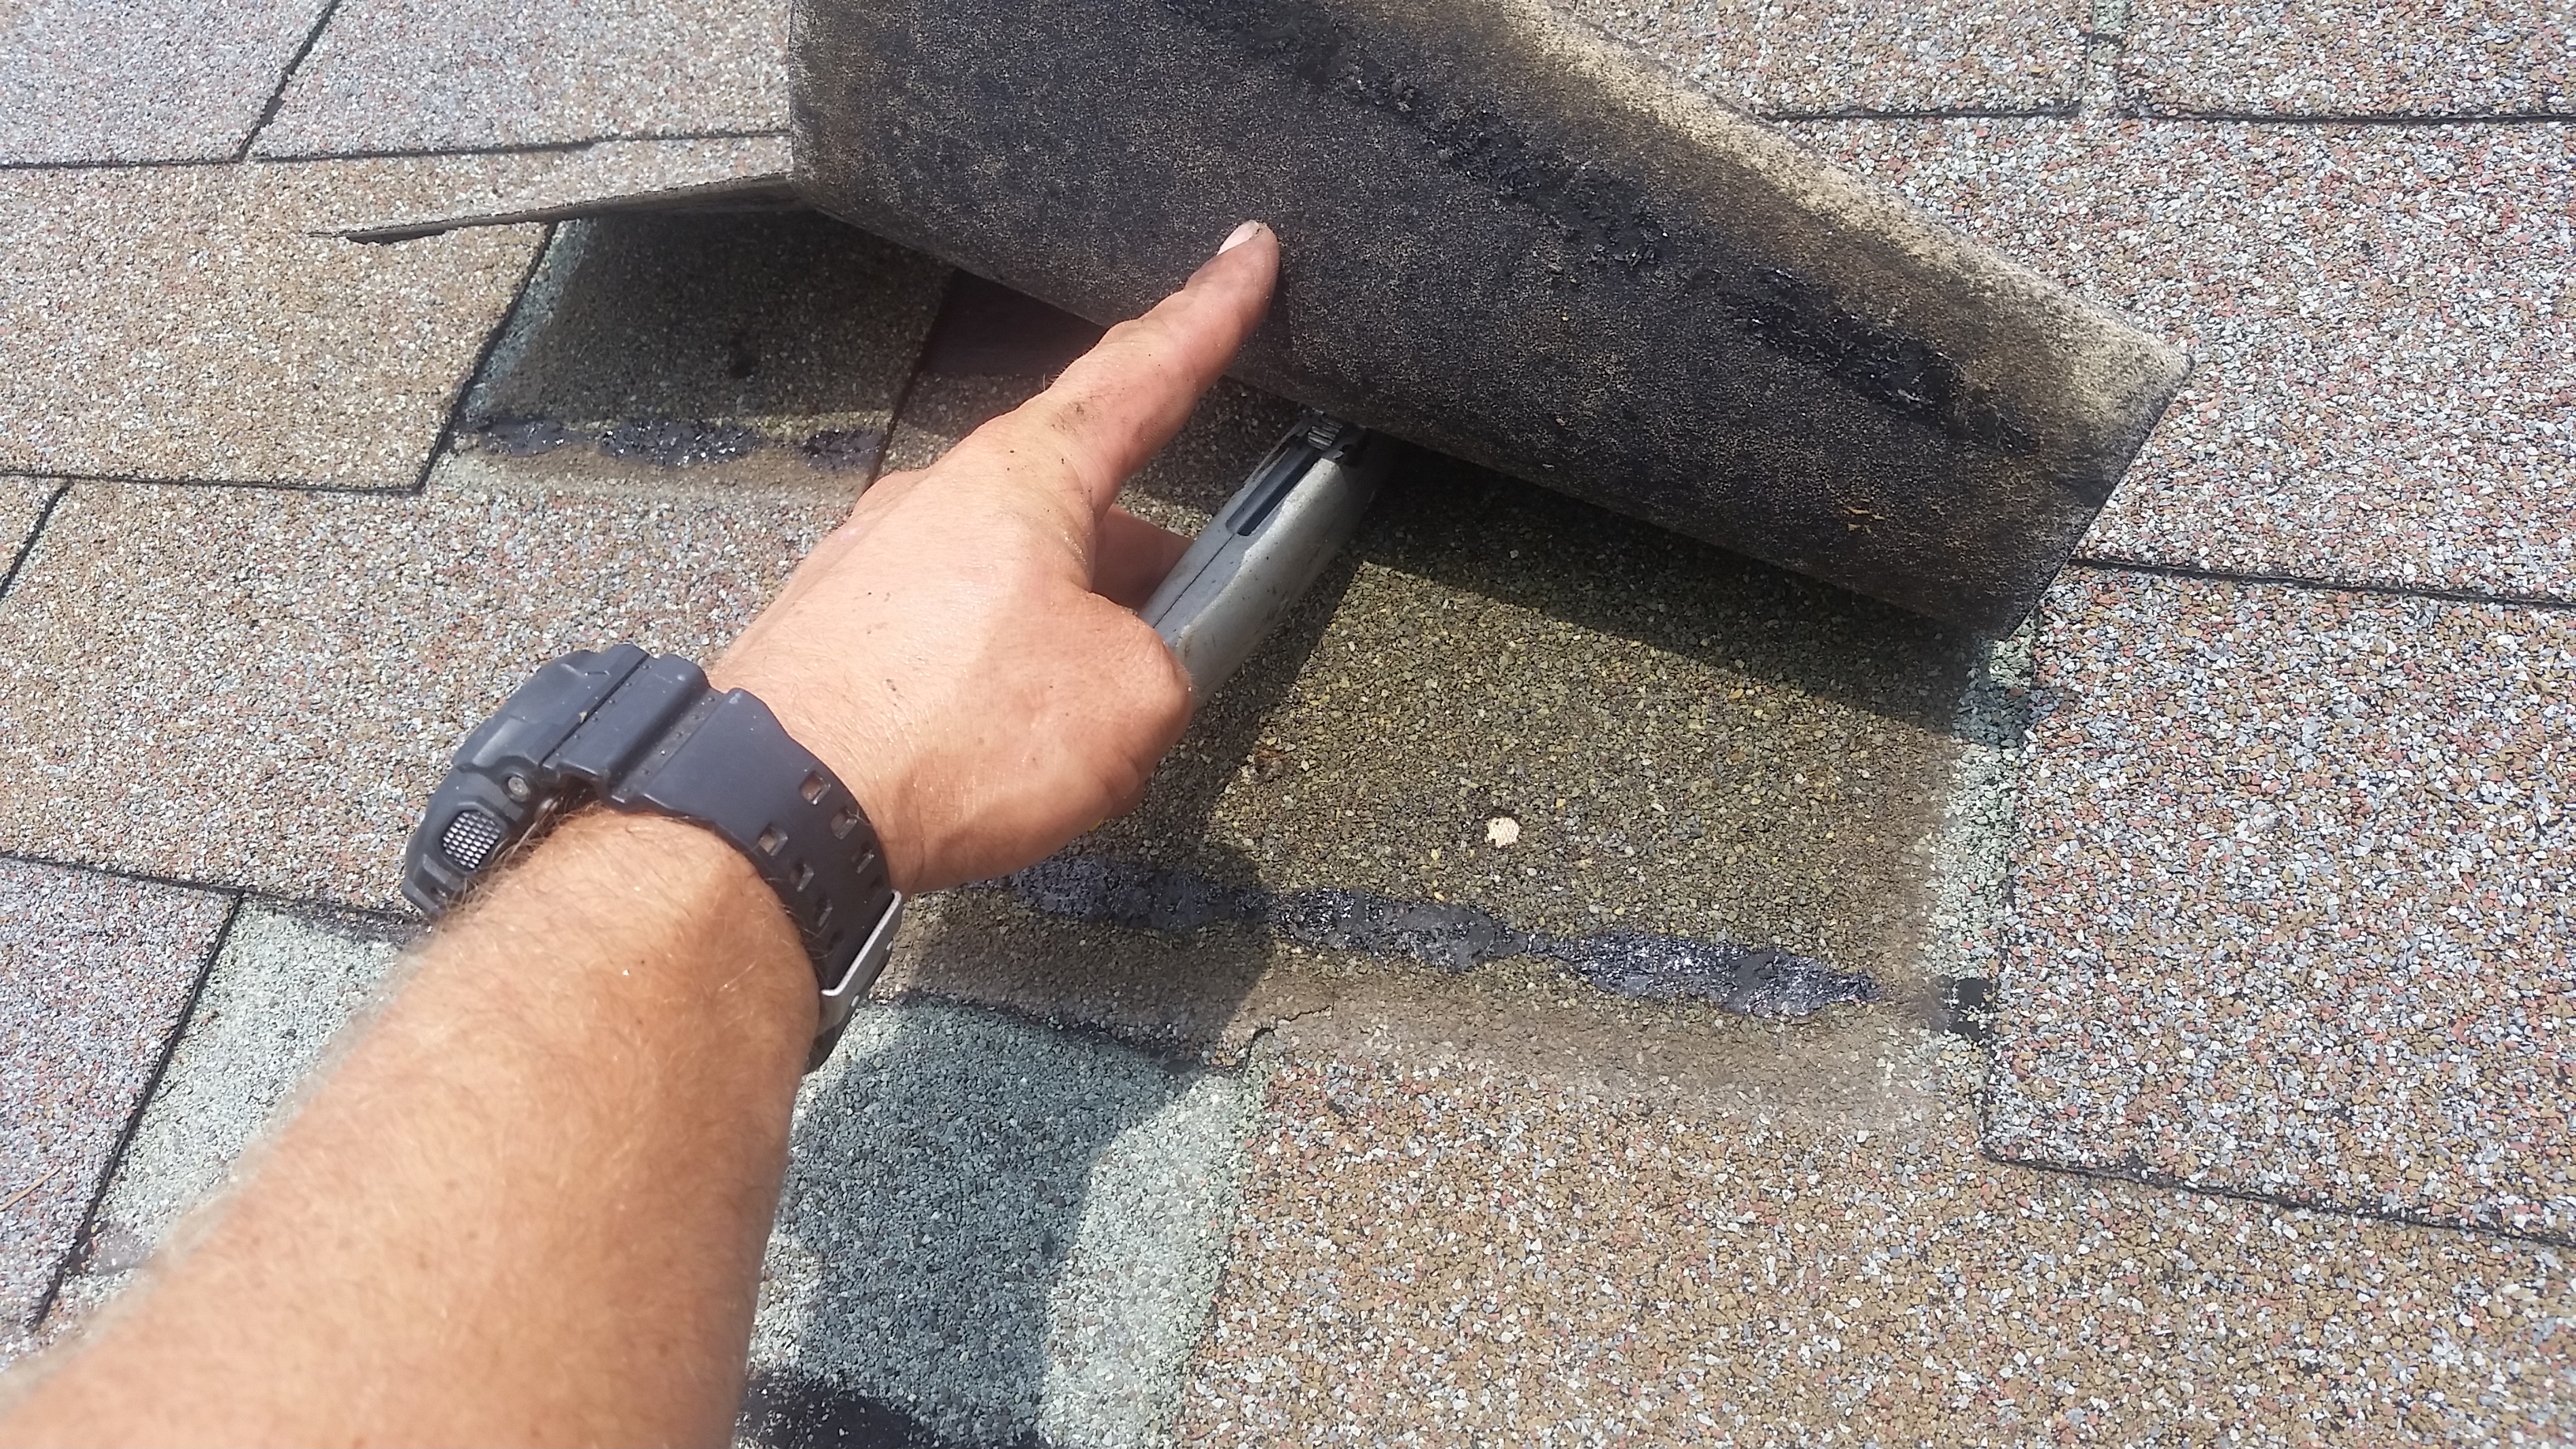
Step Five: Pull what’s left of the shingle tab out.

This is the remaining part of the shingle tab that did not blow off.
Step Six: Take your new shingle and cut a tab off, being sure to make your cut as straight as you can, and then the slide the new tab in. Again, using a hook blade is preferable, but using scissors will work fine.

As straight as possible, cut a new tab off of a shingle.

Slide the tab under the shingles to get it lined up.
Step Seven: After making sure your shingle tab is in line with the rest of the shingles, put two nails on either side of the tab, being sure to place the nails on the nail line. Do not nail in the middle of the tab, as the tabs above may not cover them.

Fasten the tab down with galvanized roofing nails, staying in the nail line. This nail is a little high, but still catches the shingle underneath.
Step Eight: Place nails in the two tabs above your new tab. Doing this will not only keep the two tabs from blowing off, but also catches the top of the tab you just installed, which means there are four nails holding your new tab instead of just two.

Lift the tabs around to see where you need to put nails at.

Putting nails in those spots will help keep the shingle held down.
Step Nine: Now that you have loosened your shingles to replace the missing tab, you must make sure you hand seal them down. The factory adhesive on the shingle will most likely not bond again, which means your shingles are at a greater risk of blowing off. Applying caulk or roof cement under the shingles will help prevent them from blowing off. Be sure to hand seal the tab you just replaced as well, as it will not have any adhesive to hold it down.

Hand sealing will help prevent the new tab and surrounding tabs from blowing off.


You have now successfully replaced your missing shingle tab, put nails in all the right areas, and hand sealed the shingles down. Pat yourself on the back for a job well done. Hopefully, no more tabs will blow off and you won’t have to do anymore repairs, but if they do, you now know the steps to take to keep your roof healthy. Good luck and thank you for reading.
If you found this post informative and useful, please share us on Google+, Facebook, or Twitter and comment below to let us know your opinion.
Comments are closed.